Showing posts with label Cricut. Show all posts

Saturday, August 16, 2025

Next Up: Jade Garden

Finally, I have begun work on Jade Garden. This was a Block of the Month project offered by Wilmington Prints in around 2021. When I found the pattern offered for free and the fabrics available, I ordered them. I've looked for the pattern to link it here but it's no longer available.

I've spent the last three days doing all the cutting. Wow, what a project; there are so many fabrics! I cut out the rectangles and squares by hand with a ruler, but most of the rest of the pieces with my Cricut.

I think I am finally finished and can start sewing it together for Friday Night Sew In. I think I'll assemble it from the center out.

This is how far I got by 3AM. LOL It is so difficult for me to be a responsible adult when pieces are just lying there ready to be sewn together!

Sunday, January 12, 2025

Fall Foliage Progress

I've finally gotten started on living room quilt #2. This is the Fall Foliage Spectacular quilt from Judy Martin's Cookies 'n' Quilts book.

As I often do, I cut out the odd-shaped pieces with my Cricut Maker.

When you start with a new cutting mat and blade, it works beautifully!

I foundation paper-pieced the little stem pieces because it was the easiest way to make them perfectly accurate. (This is a departure from Judy's original pattern so I made a handy pdf with foundation pieces. You can download it here. Be sure to print out at 100% or they won't be the correct size.)

Now I just need to make 44 more leaves for the border! LOL

Linking up with:
Oh Scrap!
Design Wall Monday

Saturday, June 8, 2024

Making Stencils

I've been playing with creating full-size stencils from stencil catalogs dating from the early 1900s (the period my house was built). I would like to add stencils in my living room and dining room. I've been blogging about it over at my house blog if anyone is interested.

I've already stencilled all the bedrooms upstairs, and now, finally, I'd like to also stencil the main floor common rooms.

I think my current favorite for the living room is this one from the Excelsior catalog from 1924.

I've been enjoying making several different options and once I get started, I'm hoping I'll stencil the frieze in the dining room as well.

My current plan is to pull out my Cricut and see if it will cut the 7.5mil mylar. If it will not, I'll be sending the files to my brother who will cut them with his laser cutter. 

Thursday, June 8, 2023

Cricut Convenience

Usually, when I'm cutting out quilt pieces with my Cricut , I gloss over that part in the blog. However, with this particular Diamond Lane pattern quilt, I found the process noteworthy, primarily because I think it actually improved the sashing block design. The original design had sashing comprised of multiple pieced squares, but I managed to consolidate them and then utilized my Cricut to carve out the shapes. The outcome? A more seamless and visually pleasing grey gingham strip!

I won't deny that turning the block design into an SVG (cut) file can be a bit challenging, but over time, I've found a method that works for me. (One can only hope that with the rising popularity of cutting machines, Electric Quilt might soon integrate a straightforward SVG file exporting option.) 

Once you have the block SVG file ready, you can upload it to the Cricut design software, and from there, it's quite easy to merge pieces and eliminate unnecessary seams. Often, I take the time to organize the pieces on the mat to avoid wasting fabric in between. This usually requires a bit of rotation to ensure the pieces nest nicely and attaching them so the Cricut machine respects my carefully planned arrangement. (I regret I forgot to take any photos of the uniquely-shaped pieces, though.)

Since getting the machine last year, I've been genuinely impressed with my Cricut's fabric-cutting performance. 

Initially, I was a bit apprehensive the consolidated shapes might complicate the assembly of the sashing blocks. But, to my delight, everything went smoothly. I just built the units progressively, leading to the final assembly. The sashing blocks were turning out so well last night that I couldn't resist pressing on until they were all sewn up, even if that meant crafting until the early hours of the morning!

Linking up with:


Thursday, June 1, 2023

June One Monthly Goal

According to my Quilt Guild, this month is supposed to be finishing my Aged Elegance bonus crib quilt. But guess what? I've got that one in the bag already – I finished it back in February. So, I've got the freedom to dive into whatever project my heart desires.

Sure, there's the Easy Street quilt that I prepped a couple of months ago. But, I ran into a little hiccup; it turns out, I made the blocks larger than the original pattern. Now, I'm in a bit of a pickle – do I go ahead with the supersized blocks, or do I take the extra step to trim them down to the size that Bonnie Hunter had in mind?

Instead of dwelling on that conundrum, I've decided to shift gears and dive into my Diamond Lane quilt using the Farmhouse Chic fabrics. These were an impromptu pandemic clearance fabric binge, and it feels good to finally put them to use.

Today, I've been knee-deep in creating the Cricut fabric-cutting files. Cutting out triangles isn't my favorite pastime, and this quilt demands plenty of them. But come tomorrow, during our Friday Night With Friends, I'm aiming to kick off the cutting stage.

So, what's my game plan for the month? My sights are set on finishing the quilt flimsy. Quilting it completely would be a bonus, but I'll be perfectly content if I manage to put the finishing touch on the flimsy.

Linking up with One Monthly Goal.

Friday, March 17, 2023

Cut Out a New Project

I spent several hours over the past few days cutting out a new project. It was inspired by a pile of scraps I've had kicking around on my sewing table for quite a few months and I needed to clean them up. This is roughly the color scheme, but since I mostly cut it out from scraps, there will be quite a bit more variation in the blocks.

I did cut quite a lot of the black with white prints from scraps, but I didn't have nearly enough so I cut some extra strips from yardage. And I cut the pointed aqua corner pieces out with my Cricut so that needed to be yardage as well. And, eventually, the outer border will also be from yardage.

Easy Street pattern by Bonnie Hunter from her book,
More Adventures with Leaders and Enders

I originally planned this as a leader-ender project, but it may end up being my actual project since I am having a hard time finding the motivation to work on my previously planned projects. Frankly, I'm a little overwhelmed. I just need to get started again. My break from sewing has already been too long

I'm planning to get started sewing blocks tonight during the Friday Night Sew In.

Friday, December 16, 2022

Arlington Square Progress

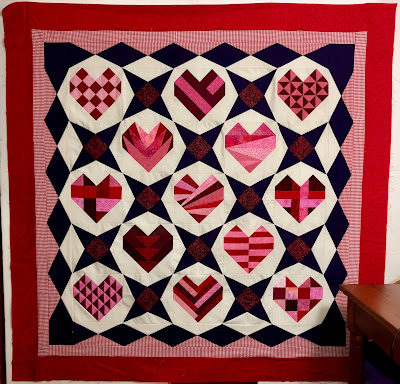
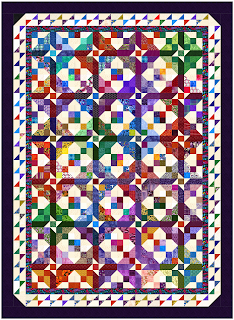
Arlington Square designed
by Pat Speth

(This post is overdue because last week I managed to drop my fairly new MacBook computer and cracked the screen. Oops. An expensive mistake. So my computer spent the last week in the shop and I was unable to post blog posts until I got it back so I have a lot to put into one post.)

When I originally started Pat Speth's Arlington Square pattern for the Rainbow Scrap Challenge, I was thinking it might take me two years to finish. One year to finish the block corner pieces, and then the second year to finish assembling the blocks and making the border pieces.

Since I've finished the other two quilts and there are still a couple of weeks left before the end of the year, I decided to try to finish this one as well. That would leave me with only one project rolling over to next year.

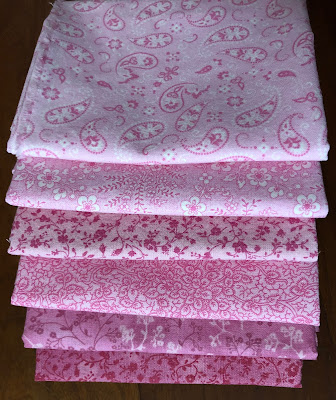
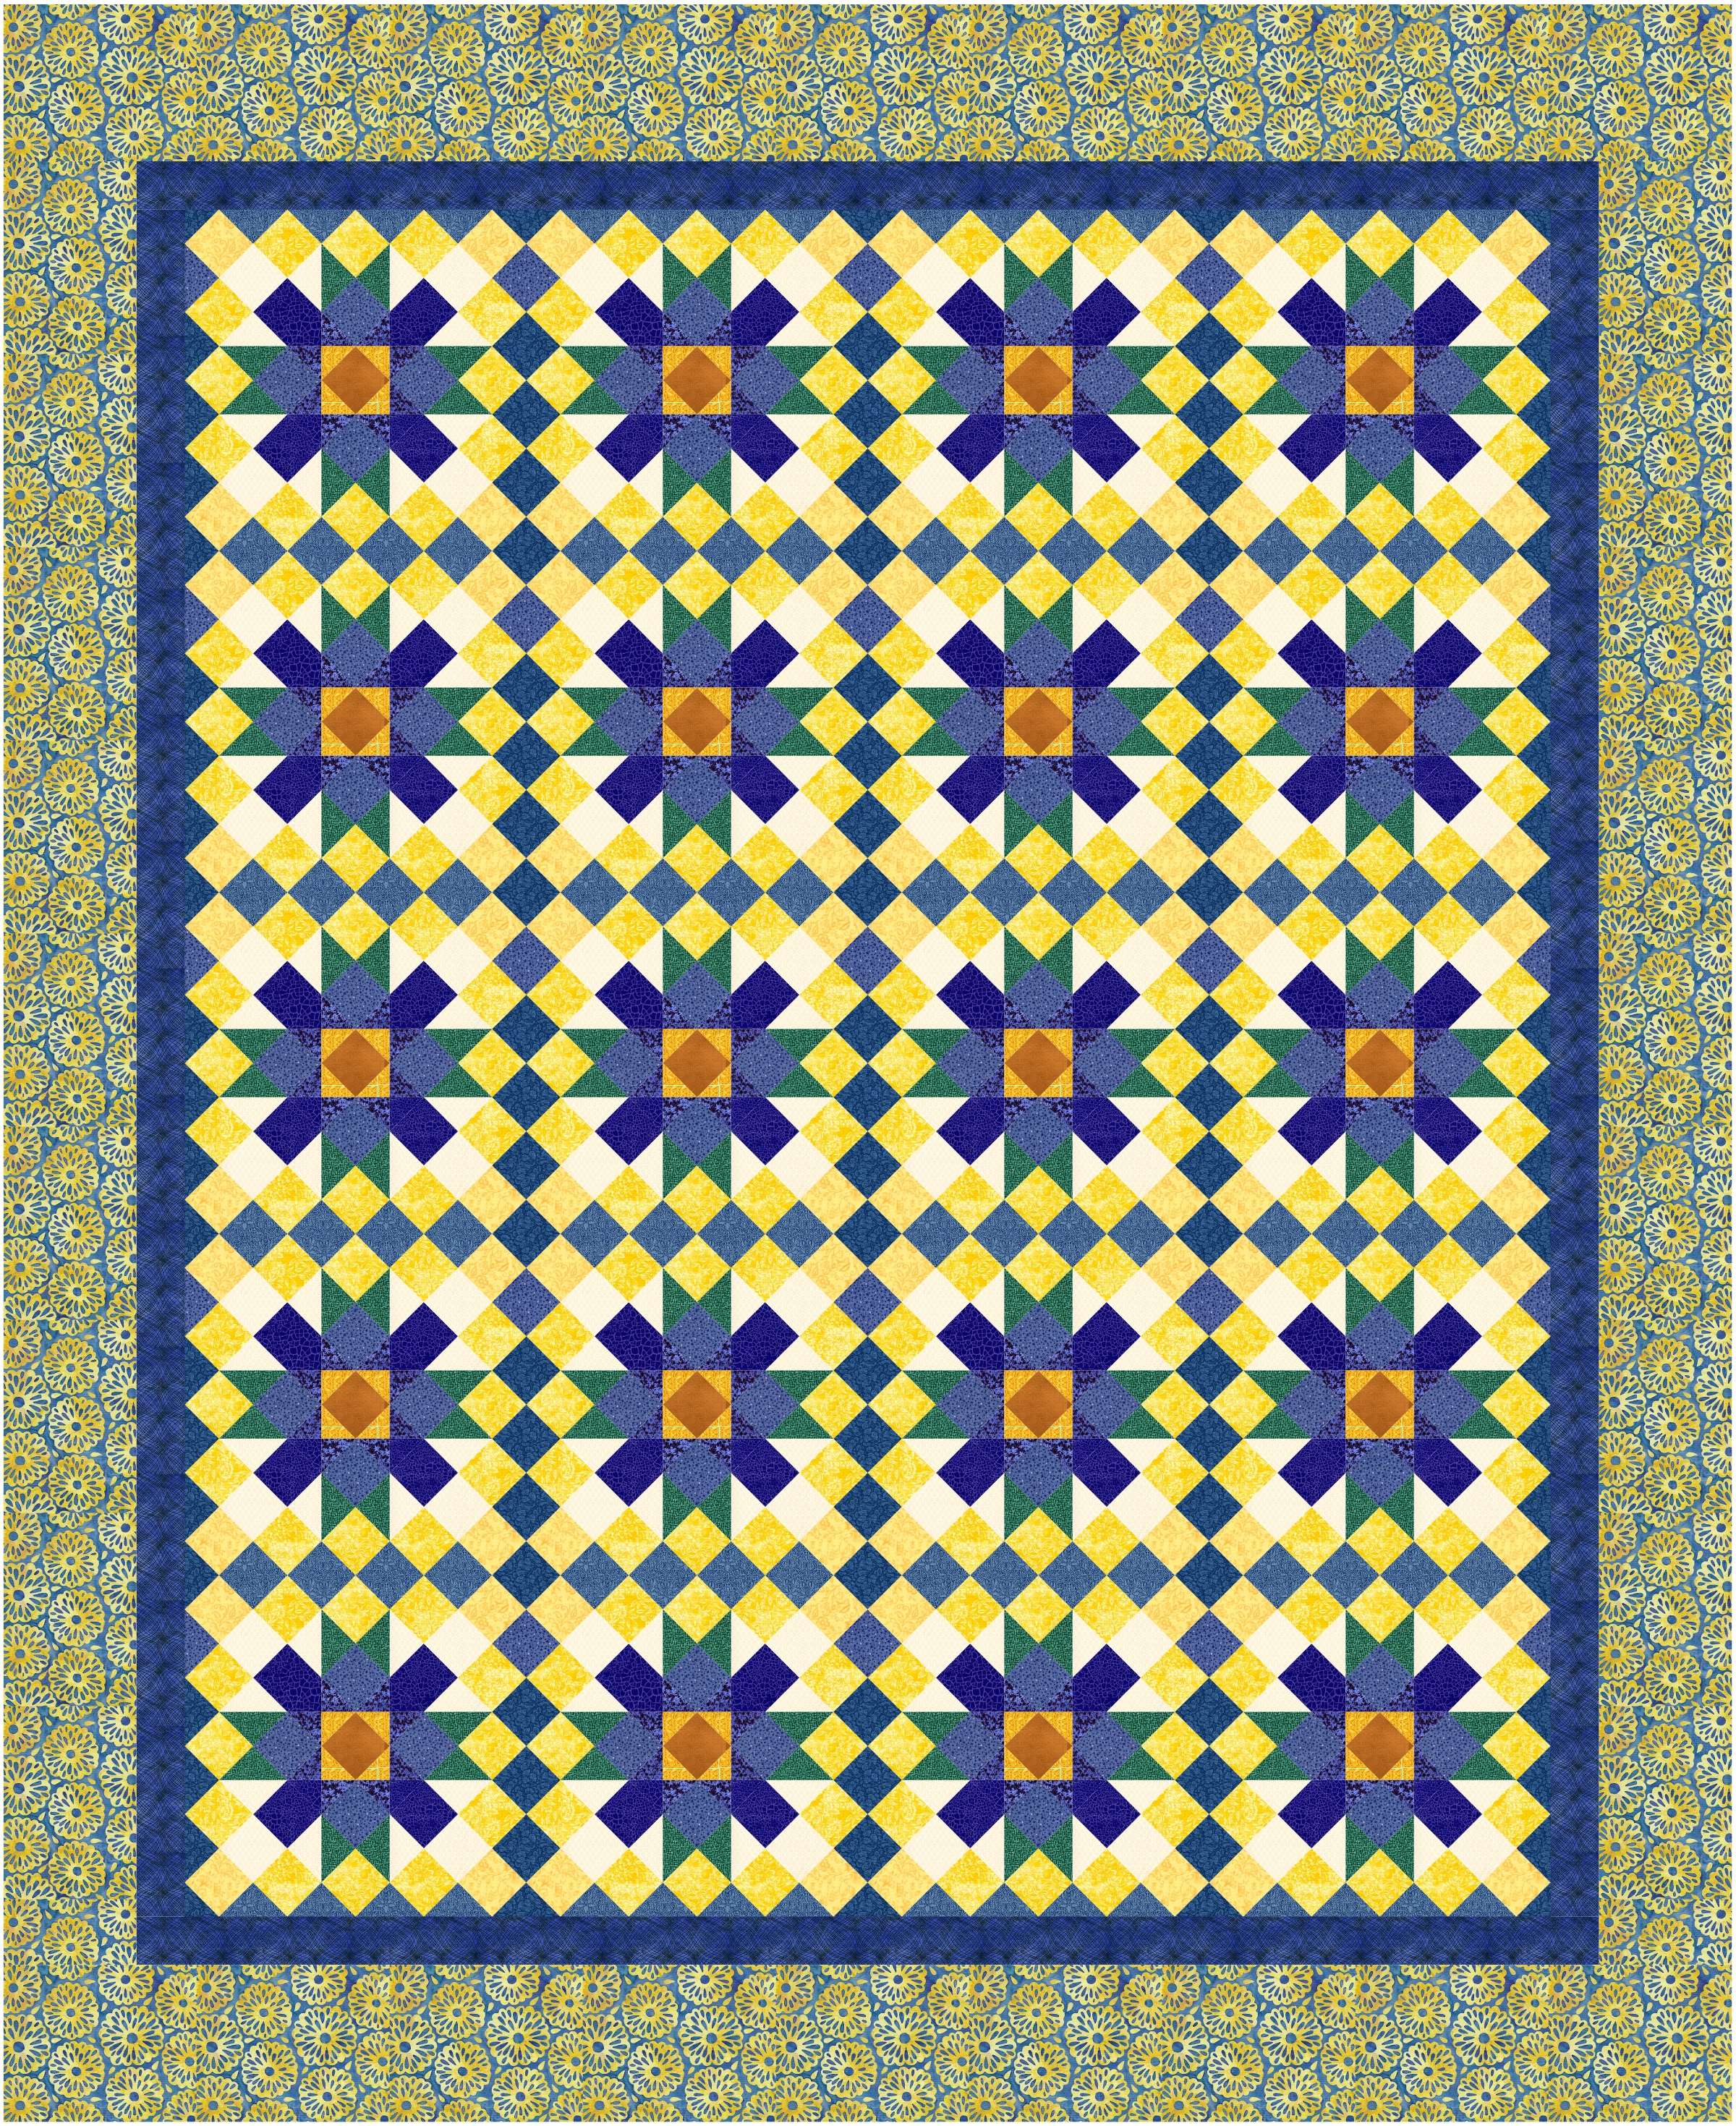
I pulled out all the block pieces I made throughout the year and laid most of them out in the photo below. I made about 10 each month and I used whatever scraps I found, including uglies, but I only used white fabrics for the light portion. 

Since I made so many quilts with white scraps this year, I actually ran out of them. Towards the end, I had to start cutting strips off yardage so I figured I might as well cut out the fiddly border on my Cricut. It definitely saved fabric because if I had cut them out by hand, I would have cut 6.5" strips and then clipped off the corner. Instead, I was able to cut out the little white triangles for the pinwheels from that bit of fabric.

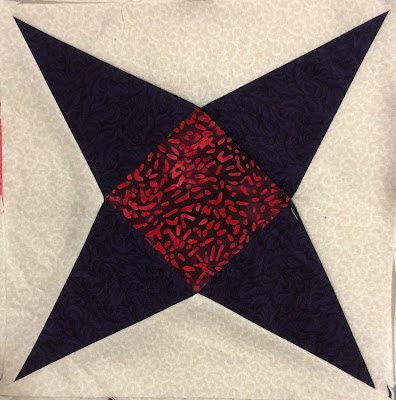
After digging around in my scrap boxes for colored waste triangles I found nearly all that I needed.
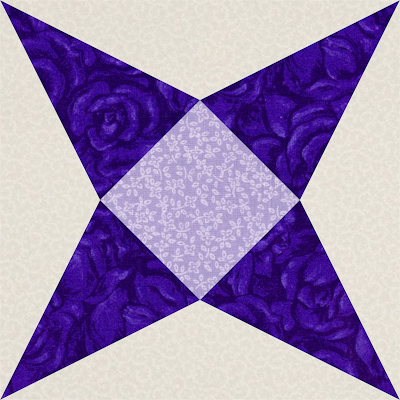
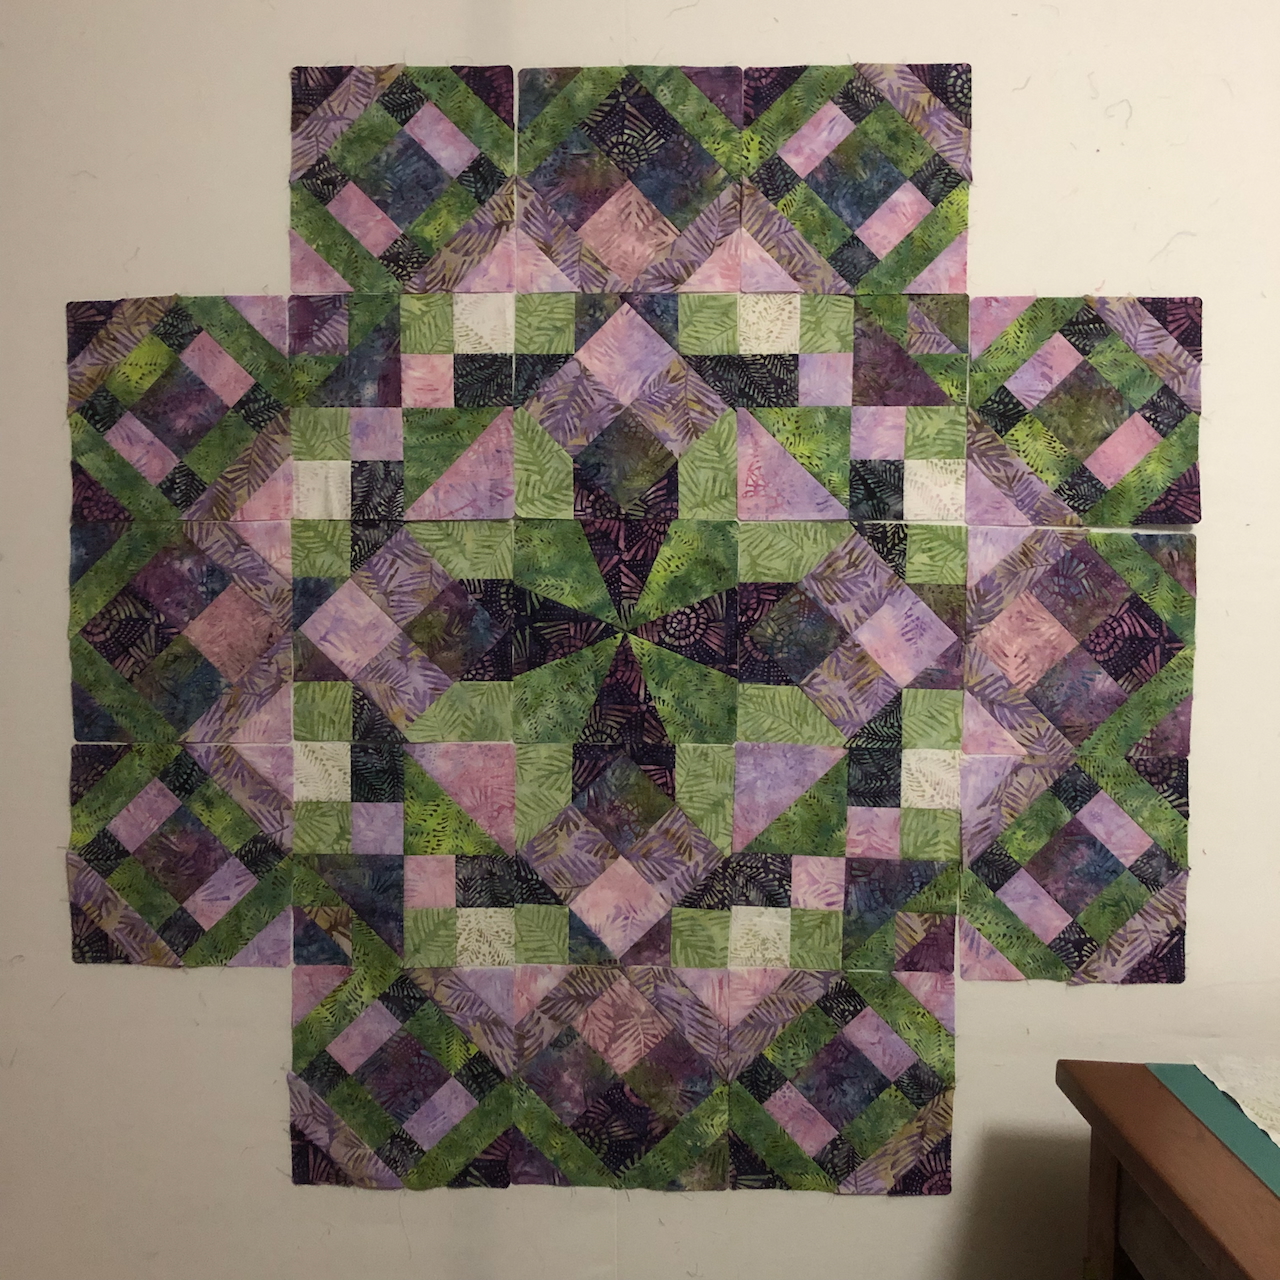
I've spent a few hours this past week assembling the blocks. I actually made 24 of them, but I have decided I really don't need another bed-size quilt. I already have too many. So, instead, I've decided to make two throw-sized quilts and gift them.  Here is the first batch of blocks assembled. 
I haven't decided if I'm going to carry it on through the borders and then start the second, or build the second set of blocks and work on the borders for both at the same time.

Tuesday, December 6, 2022

Unbeweavable Finished!

My second Unbeweavable quilt is finished! This was actually a quilt I cut out by mistake when I used my Cricut to cut out the first one. I was math-challenged and cut out twice as many pieces as I needed, only these weave in the reverse direction from the first quilt.

I used the Washington's Puzzle block (c. 1900) from my Blockbase software to export the svg file. 

The weaving color design was copied from someone else's design, only they are selling a special ruler to make it, but their minimum size block is 6". My finished blocks are 4". Without my Cricut Maker, I probably would not have attempted to make this, those little pieces would have been too fiddly to cut out by hand. I love my Cricut Maker.

Sadly, I made a quilt label for this quilt and then forgot to sew it on before I bound it. Oh well. I'm still new to making quilt labels so they haven't been added to my mental checklist yet.

For the pantograph, I used the Water Lily Allover pantograph, designed by Darlene Epp. It was included with my ProStitcher software. My goal was to align the pantograph curves so they matched the curves in the quilt. It was a bit of a challenge because I had to size the pantograph larger than the quilt and then crop it down to the dimensions of the quilt.

To be honest, I'm a little disappointed with my pantograph choice as I was not entirely successful in aligning it perfectly. It started out pretty well, but by the end, it was about a quarter-inch off. In future, I will likely be better off sticking with pantographs that align with smaller areas (like a row) or don't bother to use a pantograph that aligns.

On Friday, I'll be linking up with

Thanks for visiting!

Saturday, November 5, 2022

Nov Friday Night w/Friends

I can't believe it's already November. It was time again for Friday Night With Friends. This month, I got started on yet another quilt. This one is for my husband's mother's 92nd birthday. I kept changing the plan for this quilt; this was at least my third. Since I'd already cut out a whole lot of 2½" squares for an earlier design, I wanted to come up with a new design that would use many of them.

This is the design I finally came up with in Electric Quilt. This is the Providence block and Double Irish Chain block in an on-point alignment. And it uses a lot of the 2½" squares. Not all of them, but more than half.

I had originally planned to cut Marianne's quilt all out of scraps, but then when I settled on this design, I decided to cut it out with my Cricut. It's just so much faster. I merged together some of the small pieces so I wouldn't have to make all those small hourglass blocks. I still cut out all the 2½" squares by hand.

By 2AM on Saturday morning, I had finished assembling all twelve of the Double Irish Chain blocks.
And I've started assembling the setting triangles.

I won't be surprised to have this quilt finished by the end of next week. And because I would like to get this quilt finished as quickly as possible so it can be mailed to my mother-in-law as a belated Birthday gift, I am going to make this my November One Monthly Goal.


Wednesday, February 16, 2022

Pieces of My Heart Quilt Flimsy

The Tickled Pink Blog Hop gave me the perfect excuse to make a heart quilt I had recently designed in Electric Quilt. It was one of the most difficult projects I have made because it included hearts that were paper pieced⏤which I had never done before⏤and the diamonds were not one of the standard ruler sizes so I had to cut them out with my Cricut. (Have I mentioned how much I love my Cricut Maker 3?)

Anyway, I'm calling it Pieces of My Heart.

It has a variety of hearts from different sources. Most of the blocks came pre-programmed in Electric Quilt 8, but at least two of the paper-pieced heart designs were from Carol Doak's 300 Paper-Pieced Blocks book. I think I may have also copied a couple of designs I saw at pinterest. Most of the red and pink fabrics were from my scrap bin, though I did buy several pieces of pink because I didn't have much in my stash. Now, if this had been Tickled Purple Blog Hop, I would have been set.

The alternate block is called the Diamond Star or Amethyst block. It was surprisingly difficult to assemble and the bias-cut fabric stretched out a little bit as I constructed them so it made the quilt assembly a little less precise than I prefer. Some of the blocks look a little loose, but I'm hoping it will be fine once I get it quilted up. I'll do a fairly tight stitching pattern to help stabilize them.

I'll be taking delivery on a Handiquilter long arm in a few weeks, as soon as I manage to get my quilt studio set up. (The basement remodel is nearly finished!) I have so many flimsies I've been saving up, but this quilt will surely be among the early batch of quilts I'll get finished.

And for a giveaway, I have two sets of pink fat quarters. I had to buy full yards of the pink fabrics, so I'm happy to share the remaining fabric. They've been prewashed and are from Marshall Dry Goods.


To qualify, you need to live in the United States and become a follower (or already be a follower) of my blog. (Sorry, international shipping is too expensive.) Please leave me a comment below letting me know you've become a follower. I'll do a random number drawing on Sunday evening to pick two winners.

I'm also linking up with 
TGI Finished Friday

Thanks for visiting my blog. This was a fun blog hop and I'm glad I got the chance to share my project with you. I hope you'll also visit the rest of the Tickled Pink Blog Hop participants.

Monday, February 14th

Tuesday, February 15th 

Wednesday, February 16th 

Thursday, February 17th 

Wednesday, January 19, 2022

Loving My Cricut

I spent today trying to figure out how to make the alternate blocks on my Tickled Pink project.
Before I cut it out, I printed some paper templates so I could accurately cut out the pieces but they were still a huge pain because the angles didn't match any of my specialty rulers.  

Also, this is one of the most difficult blocks I have ever constructed because of the angled seams. I made a practice block earlier today and it was a challenge, but I think I can do it.
I kept changing my mind about what fabrics to use. I have a bolt of dark purple fabric I bought about 20 years ago and I decided to use that for the points. I also changed the center fabric yet again for the final quilt.
My Cricut made easy work of these very complicated pieces. Now I get to spend several days building all these blocks. It's going to be quite a challenge.

I'm linking up with Midweek Makers.

Update on Thursday: Spent part of the day trying to build these blocks. They are not fun to sew. I tried several methods to build them and have not figured out a good way to make sure all the points line up perfectly. I finally decided done was better. 22 to go.